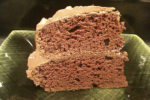
 Grab a cup of milk, its chocolate cake time. A French princess said it best when she said, “Let them eat cake”; only the context she used was deplorable. But just to get back let us all Eat Cake. Cake (birthday) is believed to be an invention of the early Greeks who took the honey cakes to the goddess of the moon. Even the lighting on the candles goes back this far in that flames made the cakes shine like the full moon and believed that the smoke would carry their prayers and wishes to the Gods who lived in the sky. Sounds familiar, “make a wish”. It wasn’t until the Middle Ages when cake would resemble what confections we make today out of flour, eggs and sugar. Now day’s cake may conjure up a few different images but always means one thing, Deliciousness. The problem with making cake is that it is not easy to get the right consistency which is why many people turn to box cake recipes that contain many preservatives, hydrogenated oils and artificial flavors. During my research I found out a great trick to get perfectly moist cake, something my mom had been doing since I was a youngster. We’ll get to this later.
A friend challenged me a while back to make a chocolate cake that scored 10 out of 10 on the cake flavor and 10 out of 10 on the taste of the frosting. With this rating I would receive a signed copy of Elvis Presley’s Favorite Recipes signed by none other than Bruce Campbell (who played Elvis in Bubba Hotep). For those of you who don’t know I had watched Army of Darkness at least once a week from the ages of 13-16. Although I wouldn’t rate my cake a perfect ten, it’s pretty close for homemade and only my second cake. So let put one together shall we.
We are going to start with a different type of frosting than the traditional you’re used to. I decided to make a ganache. Ganache is French icing used on pastries and truffles along with other various uses. The key to making the right ganache is the ratio of chocolate to cream to get the right consistency. This type of icing implores that you use the best chocolate you can find as it is what stands out unlike with lard or butter cream frosting. I used Ghirardelli chocolate as it typically the best you can find at the market but may consider some artisan chocolate now that I know how great this icing recipe is. It will turn your standard cake into one that everyone will ask you for the recipe. Lets get started. Here’s what you’ll need.
Gnashe
Ingredients:
- 10 oz bittersweet chocolate (do not exceed 61%)
- 1 1/2 cups (3 sticks) unsalted butter softened
- 3 cups of powdered sugar
- 1tbs vanilla extract
- 1/2 cup coconut milk
- 1/2 cup of heavy whipping cream
Directions:
In a double boiler on simmer start to melt your chocolate stirring ever few minutes.
 Using a hand mixer or a Kitchen aid mixer with whisk attachment, whisk coconut milk and heavy cream together until thickened. The cream will go through stages of thickness if you do not stop whisking becoming very firm, you want a light and foamy mixture so don’t over whisk. In a separate bowl use a hand mixer and mix the butter to a whipped consistency.
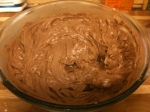
  You will then add the powdered sugar and the vanilla extract and continue to mix. When the chocolate is warm and fully melted add it to this mixture and continue to mix until all the same consistency and color. Set aside as this will be the icing on the cake (get it?). On to the cake.
So enough suspense. What is the secret to a super moist and evenly cooked cake…Mayonnaise, yes mayo. Think about it, mayo is a mixture of egg yolks and oil, things you usually add to a cake anyway so it not as gross as is sounds. Anyway this makes for a great batter that doesn’t clump and stays moist throughout the cooking process. So lets put this thing together.
Ingredients:
- 4 cups flour
- 6 tbsp. cocoa
- dash of salt
- 2 cups boiling water
- 2 cup sugar
- 3 tsp. baking soda
- 2 cup mayo (make your own mayo)
- 2 tsp. vanilla extract
 Directions Sift together flour,sugar and salt,set aside. Add boiling water to mayo and vanilla extract and blend well. Add dry ingredients all at once and beat well. Split contents to 2 greased nine inch bundt pans and bake for 30 minutes on 350 degrees. Let cool for 15-20 minutes then transfer to cooling rack for at least 15-20 minutes. Frost the cake to desired icing. Enjoy.
Special thanks to Mom who shared her cake recipe and hopefully others will enjoy it as much as I did.

*Side note for high altitude baking as requested:
With less air pressure weighing them down, leavening agents tend to work too quickly at higher altitudes, so by the time the food is cooked, most of the gasses have escaped, producing your flat tire. For cakes leavened by egg whites, beat only to a soft-peak consistency to keep them from deflating as they bake. Also, decrease the amount of baking powder or soda in your recipes by 15% to 25% (one-eighth to one quarter teaspoon per teaspoon specified in the recipe) at 5,000 feet, and by 25% or more at 7,000. For both cakes and cookies, raise the oven temperature by 20° or so to set the batter before the cells formed by the leavening gas expand too much, causing the cake or cookies to fall, and slightly shorten the cooking time.
Flour tends to be drier at high elevation, so increase the amount of liquid in the recipe by 2 to 3 tablespoons for each cup of flour called for at 5,000 feet, and by 3 to 4 tablespoons at 7,000 ft. Often you will want to decrease the amount of sugar in a recipe by 1 to 3 tablespoons for each cup of sugar called for in the recipe.
Read Full Post »


