Feeds:
Posts
Comments

Archive for May, 2010

This was pointed out to me by one of my friends.  It is a story that’s going viral within the blogging and news world about the lengths the military has gone to to ensure perfect brownies.  There is a 26 page document (standard operating procedure) for making what is to be considered an appropriate brownie for long term storage and to meet military standards.  There’s not a lot that I’ll say about such a document and the buzz that’s going around that this is a colossal waste of taxpayer’s money but this of course is the military, failure is not an option.  Take a look at the article here:

http://www.npr.org/templates/story/story.php?storyId=127058298

Here is the actual pdf if you want to bake your own Military Brownies

http://liw.iki.fi/liw/misc/MIL-C-44072C.pdf

after reading the recipe I cannot condone making these for the home (read all the preservatives).  Although they sound like the perfect solution for the troops being that they can last up to 3 years if packaged correctly.

Happy Memorial Day

Read Full Post »

Greek yogurt is essential for many Mediterranean recipes.  You’ll usually find it in the dairy section at twice the cost of regular plain yogurt and usually only half the amount.  That’s right, you’ll pay almost 4 times as much for greek style yogurt than plain yogurt.  Here’s a quick tip to make your own greek style yogurt.

Purchase one 32 ounce plain, unflavored container of yogurt.  Place a cheesecloth in a strainer over a bowl.  Empty the contents of the yogurt container into the cheesecloth.  Cover with the excess cheese cloth and place in refrigerator and let drain for up to six hours.  You should lose a good amount of water, around 8 ounces.  Remove from fridge and you have delicious Greek style yogurt for about a third of the cost. Enjoy.

Keep in mind that this will make Greek “style” yogurt. Both this and the kind bought in stores are made with cow’s milk.  There are some Greek yogurts made with goats milk that will give you a different yet similar flavor but these usually cost much more than the cow varieties.  Let me know if you try it and what you think.

Read Full Post »

It’s really special when people give you gifts first and foremost and it means a lot when they’re geared toward what you love to do.  I received a few gifts that I wanted to share and thank those people.

First I received Herbs&Spices by Jill Norman from Stefanie’s mom (my other mom).  This book is great.  From what they taste like to how to store them and all the different uses along with some history this is the most concise book of Herbs and Spices I have come across yet.  It also has a recipe section and a place to order hard to get herbs and spices.  If you want a book on this subject this one shouldn’t be overlooked.  Thanks Colleen!

My mom has gotten me something that we have long been wanting, a Kitchen Aid ice cream maker.  We both love ice cream and have been wanting to make our own since the inception of the Single Ingredient Project.  This will be well used and hopefully the fruits of it’s labor will be shared as well.  Thanks Mom!

My brothers Pat and Jake and his fiance Sarah got me a Tiffin Box.  This is a food storage container that can be used to store to store hot or cold meals in separate containers so you don’t mix food items.  This is such a great idea as I have so many leftovers from this project that I am usually bringing in 2-3 sometimes 4 small tupperwares to work.  This is such an appropriate gift and I love it.  Thanks guys.

The boys and Sarah also got us some magnetic spice holders that now reside on the side of the fridge but will make there way to the cabinets when it is fitted with the materials so they will stay on .

Again thank you all for the wonderful birthday wishes and gifts.  They are so appreciated and so are you.

Read Full Post »

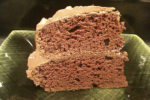
Grab a cup of milk, its chocolate cake time. A French princess said it best when she said, “Let them eat cake”; only the context she used was deplorable. But just to get back let us all Eat Cake. Cake (birthday) is believed to be an invention of the early Greeks who took the honey cakes to the goddess of the moon. Even the lighting on the candles goes back this far in that flames made the cakes shine like the full moon and believed that the smoke would carry their prayers and wishes to the Gods who lived in the sky. Sounds familiar, “make a wish”. It wasn’t until the Middle Ages when cake would resemble what confections we make today out of flour, eggs and sugar. Now day’s cake may conjure up a few different images but always means one thing, Deliciousness. The problem with making cake is that it is not easy to get the right consistency which is why many people turn to box cake recipes that contain many preservatives, hydrogenated oils and artificial flavors. During my research I found out a great trick to get perfectly moist cake, something my mom had been doing since I was a youngster. We’ll get to this later.

A friend challenged me a while back to make a chocolate cake that scored 10 out of 10 on the cake flavor and 10 out of 10 on the taste of the frosting. With this rating I would receive a signed copy of Elvis Presley’s Favorite Recipes signed by none other than Bruce Campbell (who played Elvis in Bubba Hotep). For those of you who don’t know I had watched Army of Darkness at least once a week from the ages of 13-16. Although I wouldn’t rate my cake a perfect ten, it’s pretty close for homemade and only my second cake. So let put one together shall we.

We are going to start with a different type of frosting than the traditional you’re used to. I decided to make a ganache. Ganache is French icing used on pastries and truffles along with other various uses. The key to making the right ganache is the ratio of chocolate to cream to get the right consistency. This type of icing implores that you use the best chocolate you can find as it is what stands out unlike with lard or butter cream frosting. I used Ghirardelli chocolate as it typically the best you can find at the market but may consider some artisan chocolate now that I know how great this icing recipe is. It will turn your standard cake into one that everyone will ask you for the recipe. Lets get started.  Here’s what you’ll need.

Gnashe
Ingredients:

  • 10 oz bittersweet chocolate (do not exceed 61%)
  • 1 1/2 cups (3 sticks) unsalted butter softened
  • 3 cups of powdered sugar
  • 1tbs vanilla extract
  • 1/2 cup coconut milk
  • 1/2 cup of heavy whipping cream

Directions:

In a double boiler on simmer start to melt your chocolate stirring ever few minutes.

Using a hand mixer or a Kitchen aid mixer with whisk attachment, whisk coconut milk and heavy cream together until thickened.  The cream will go through stages of thickness if you do not stop whisking becoming very firm, you want a light and foamy mixture so don’t over whisk.  In a separate bowl use a hand mixer and mix the butter to a whipped consistency.  You will then add the powdered sugar and the vanilla extract and continue to mix.  When the chocolate is warm and fully melted add it to this mixture and continue to mix until all the same consistency and color.  Set aside as this will be the icing on the cake (get it?).  On to the cake.
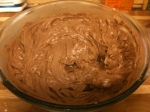
So enough suspense.  What is the secret to a super moist and evenly cooked cake…Mayonnaise, yes mayo. Think about it, mayo is a mixture of egg yolks and oil, things you usually add to a cake anyway so it not as gross as is sounds.  Anyway this makes for a great batter that doesn’t clump and stays moist throughout the cooking process.  So lets put this thing together.

Ingredients:

  • 4 cups flour
  • 6 tbsp. cocoa
  • dash of salt
  • 2 cups boiling water
  • 2 cup sugar
  • 3 tsp. baking soda
  • 2 cup mayo (make your own mayo)
  • 2 tsp. vanilla extract
  • Directions Sift together flour,sugar and salt,set aside. Add boiling water to mayo and vanilla extract and blend well. Add dry ingredients all at once and beat well. Split contents to 2 greased nine inch bundt pans and bake for 30 minutes on 350 degrees.  Let cool for 15-20 minutes then transfer to cooling rack for at least 15-20 minutes.  Frost the cake to desired icing. Enjoy.

    Special thanks to Mom who shared her cake recipe and hopefully others will enjoy it as much as I did.

*Side note for high altitude baking as requested:

With less air pressure weighing them down, leavening agents tend to work too quickly at higher altitudes, so by the time the food is cooked, most of the gasses have escaped, producing your flat tire. For cakes leavened by egg whites, beat only to a soft-peak consistency to keep them from deflating as they bake. Also, decrease the amount of baking powder or soda in your recipes by 15% to 25% (one-eighth to one quarter teaspoon per teaspoon specified in the recipe) at 5,000 feet, and by 25% or more at 7,000. For both cakes and cookies, raise the oven temperature by 20° or so to set the batter before the cells formed by the leavening gas expand too much, causing the cake or cookies to fall, and slightly shorten the cooking time.

Flour tends to be drier at high elevation, so increase the amount of liquid in the recipe by 2 to 3 tablespoons for each cup of flour called for at 5,000 feet, and by 3 to 4 tablespoons at 7,000 ft. Often you will want to decrease the amount of sugar in a recipe by 1 to 3 tablespoons for each cup of sugar called for in the recipe.


Read Full Post »

The challenge of All Request Thursday has been answered and answered well.  Due to the late entry of Mr. Cognito and the outrageous requests for a 3 pound cut of filet mignon we had decided to go ahead and make Eggs Benedict (fajitas and a possibly sesame chicken will be made soon).  I say “we” but what I really mean is Stefanie.  I played sous chef and she played the commanding experienced head chef.  I set up the kitchen and she put in all the time and effort that it takes to make a real Hollandaise sauce and then expertly cooked not one but two perfectly poached eggs at the same time.
Thanks has to also go out to Dan Fugate who was generous enough to donate a dozen farm fresh eggs from his family’s farm.  They were definitely the X-factor that put this recipe over the top.  Using the Fish House Eggs Benedict for reference, I think we may have, I mean I know we exceeded the taste and quality of theirs.  This is now my new favorite breakfast (for now).
So here’s what it’ll take to make the best Eggs Benedict you’ve ever had.
Hollandaise Sauce
Ingredients:

  • 4 egg yolks (farm fresh if you can get them)
  • Juice from half of one regular sized lemon (~1/2tbs)
  • 1 stick unsalted butter
  • Pinch of Cayenne
  • Pinch of salt

Directions:
Whisk the egg yolks and lemon juice in a metal bowl until the mixture is doubled in volume.

Place the mixture over a saucepan with simmering water (the water should not touch the bottom of the bowl.  To hot and the eggs will curdle, low and slow.  If you have a double boiler you can use that as well.  Continue to whisk and whisk and whisk.  Slowly drizzle in the melted butter and whisk until the sauce thickens and the volume doubles again.

Remove from the heat and whisk in the cayenne and salt.  Place it in a warm spot until the eggs are ready (just a few minutes).

Eggs Benedict
Ingredients:

  • 2 pieces of bacon
  • 2 english muffins
  • 1 tbs white vinegar
  • 4 eggs
  • salt and pepper to taste
  • Hollandaise sauce
  • Parmesan cheese

Directions: Brown bacon to your preference.  Toast the english muffins.  Fill saucepan (10 inch preferred) with water and bring to a slow boil (2-3 bubbles a second).  It’s time to poach your eggs.  Here’s a few secrets to making a perfect poached eggs.  Place 1 tbs of vinegar in the slow boiling water.  This will help cook the eggs faster and make the whites hold together.  Break the egg into a small bowl not directly into the water.  With a slotted spoon gently spin the water in the pan so it creates a small vortex in the middle and gently place the egg in the water.  You can move this egg to the outside edge and repeat with another egg.  While the eggs are cooking fold the whites over the yolk all the while the eggs are cooking and holding together more.

The eggs should be cooked for 3-4 minutes depending on doneness.  If you want a runny yolk then 3 minutes should be plenty.  With a slotted spoon retrieve egg from water and let drain for a few seconds.  Place on English muffin with a piece of bacon underneath.  Spoon Hollandaise sauce over egg and top with grated parmesan.  Time to eat.


This was honestly the best egg dish I have eaten to date.  The Hollandaise sauce was velvety and the eggs, perfect.  There are a few areas I could see pitfalls occurring.  Use unsalted butter and don’t salt your eggs if you are going to a use a salty meat such as bacon.  I prefer the english muffin to be lightly toasted as you don’t want it to be anything more than a delivery system for the eggs and sauce.  Don’t rush the Hollandaise sauce as it can scramble or curdle easy.  Take your time and be patient, don’t make this when you’re starving.  Enjoy.

Read Full Post »

Today I am taking requests.  I would like a new challenge and to learn something new.  Don’t worry Mark, I’m still working on the chocolate cake (version 2.0 should be done tonight).  Leave me a comment about what I should make and the most votes wins.  Any food you want within financial reason of course.

Here are my rules:

I will make break down whatever recipe into one single ingredient at a time.  I’ll give step by step guides on how to make the dish.  No box mixes, no preservatives, no premade anything. 

Let’s get to voting

Read Full Post »

You’re having company and you need a good meal that tastes great and you need it to be ready about the time you get home from work.  What do you do?  You pull out one of the best pieces of equipment in your kitchen…the crock pot or slow cooker.  I love my Crock-Pot. Everything I put in it turns to gold.

The Crock-Pot is a relative recent cooking invention (1971 to be precise) that lets you start a dish in the morning and finished by the time you get home.  This is a much better alternative than cooking the night before and heating up leftovers and tastes better also.  The Crock-Pot is great at cooking meats that will toughen when boiled by cooking for longer periods of time at lower temperatures.  This softens connective tissue without making the meat tough.  Now you will loose some nutrients from the vegetables by cooking them for so long so don’t expect the same nutrition out of them as steamed veggies. 

Last night I put together a Pot Roast and put it on this morning.  The preparation is easy so don’t shy away from this one.  Here’s what you’ll need;

  • Ingredients:
  • 1 clove garlic
  • 1 bay leaf
  • Salt and pepper
  • 1-2 tbs Extra virgin olive oil
  • 2 onions
  • ½ stalk celery
  • 1-2 cups vegetable or beef stock (I will post my veggie stock recipe soon)
  • 3-4 lb rump roast
  • 1 cup Red wine

Directions:
Cut garlic into slivers and place into cut slits on the roast.  Crush bay leaf and add to ½ tbs crushed black pepper and 1 tsp salt.  Rub the entire Roast with the seasoning.  (Optional) Heat some oil in a large pot or pan and brown roast on all sides.  Add roast to the crock pot.  Add all vegetables to the crock pot cover and place in fridge (unless cooking same day).  Day of cooking- add 2 cups veggie or beef stock and red wine to crock pot.  Turn on and cook on low for at least 8 hours. Done.

This recipe is an easy one and tastes just like your gramma made it, unless of course you are a grandma then in that case it’ll taste just like you made it.  I made a simple horseradish sauce to go with this which is takes five minutes but is worth it.  1 cup heavy whipping cream 1/4 cup horseradish (fresh) 1/4 cup bleu cheese and a tbs of dijon mustard.  Blended all ingredients well in the food processor (cream will thicken) and let it sit for a few hours to blend all the  tastes.  If you try this recipe let me know what you think.  Enjoy.

Read Full Post »

Blackening is a modern cooking style invented by the chef Paul Prudhomme.  This technique was an answer to the problem about how to make fish cooked inside taste more like fish grilled outside.  This process gives the fish or seafood a distinct charred appearance and a spicy and smoky flavor.  This technique is easy and only requires three ingredients and a cast iron skillet; seafood, butter, blackening spice.  To make your own blackening spices just follow this simple recipe;

Ingredients:

  • 2 teaspoons ground paprika
  • 4 teaspoons dried leaf thyme
  • 2 teaspoons onion powder
  • 2 teaspoons garlic powder
  • 1 tablespoon granulated sugar
  • 2 teaspoons salt
  • 2 teaspoons black pepper (fresh ground peppercorns if you have them)
  • 1 teaspoon ground cayenne pepper (you can add more but the heat increases quickly)
  • 1 teaspoon dried leaf oregano
  • 3/4 teaspoon ground cumin
  • 1/2 teaspoon ground nutmeg

Directions:  Mix and store in a cool dry place. 

Now you’re ready to blacken anything.  Here goes.  The first thing you’ll want to do is get your cast iron skillet good and hot.  Now melt about 2-3 tbs of butter per two fish filets or 12 jumbo shrimp.  You’ll want the fish to be about ½ of an inch thick or it won’t cook all the way through (we can finish it off in the oven if your fish is larger than this).  You’ll want to add about 1 tbs of spice to 3-4 tbs of the melted butter and mix.   

When the cast iron is hot dip your fish or seafood into the butter and immediately place on skillet (pat down seafood before placing it in the butter mixture as it will stick better when completely dry). 

Flip when you see the nice dark crust form on the underside.  This should only take 1-2 minutes depending on your heat.  If your fish is not cooked entirely through don’t leave it on the cast iron as it will burn and taste not so pleasant.  If needed place fish on a cookie sheet and bake the rest of the way at 350 for a few minutes on each side until done.  There you have it; you’re ready to blacken anything!

Just a few tips:

This works best on more delicate fish like redfish or even tilapia (probably the only way to eat tilapia).

This will cause a lot of smoke in the house so be prepared for the fire alarms to sound.  A great oven hood is recommended or at least some box fans. 

There is a fine line between blackening and burnening (just made that up).  Test your heat and blackening skills on a less expensive fish before you potentially burn twenty dollars worth of redfish.  Shrimp are much more forgiving. Enjoy.

Read Full Post »

While eating whole foods is becoming much more integrated into our everyday lives the easiest meal to make from scratch for me is a salad. The term “Salad” encompasses so many dishes from leafy greens to cold pasta salads to fruit salads, though I’ll be focusing on the garden salad.
Dressed salad dates back to at least the Babylonians over two thousand years ago who used oil and vinegar over mixed greens. It wasn’t until the nineteenth century that the Garden Salad were popularized and adopted all over the world.
While the salad in todays culture has become a dressing transport system, the flavor of bottle dressings in general taste bland or non-natural to me and the list of ingredients can be staggering. When you make your own dressings the taste seems to “pop”. I’ll start you off with a base vinaigrette that is clean, fresh and tasty. Here’s what you’ll need.
Ingredients:
1 cup extra virgin olive oil
1/3 cup wine vinegar
salt and pepper (to taste)
half bunch green onion (optional)
1/2 tbs Dijon mustard (optional)
1/2 tbs Herbs (optional)
1 clove Garlic (optional)
up to 1 tbs Honey (optional)
Directions:
Combine ingredients except the green onion in food processor and turn on until an emulsion forms. Add onion and pulse until minced. Taste and adjusts vinegar and oil then serve.

It really doesn’t get much easier than this recipe. If the dressing taste to acidic for your liking you can add sugar, honey or any favorite sweetener. The mustard really helps keep an emulsion and adds a nice flavor. A favorite herb I like to use is rosemary in my dressings. It gives your salad a lot of body and adds great aromatics. That’s it! In under five minutes your making your own salad dressings that taste leaps and bounds better than shelved varieties and have no preservatives.

I’ll leave you with a link to 20 of the best salad recipes from Allrecipes.com.  Enjoy.

http://allrecipes.com/Recipes/Salad/Top.aspx

Read Full Post »